HOW TO SAVE TIME LESSON PLANNING USING GOOGLE SLIDES

Google Slides is a powerful tool for creating slideshow presentations... but it doesn't stop there!
What if I told you that Google Slides can also be used to make your lesson planning faster and easier?
Yes, really! If you feel like lesson planning takes forever, check out these 3 easy ways to simplify the process using Google Slides.

1. CREATE UNIT SLIDES

Have you ever written detailed lesson plans in your teacher planner only to never look at them during your lesson? It feels like such a waste of time and your efforts can be better spent planning your lessons in a way that ACTUALLY improves your instruction.
Instead of writing down every detail of your lesson plans in your planner, consider creating a set of unit slides in Google Slides that outline your lessons! Then, you can easily present the slides during your lesson and follow along without worrying that you'll forget the details.
Plus, you can easily add images, videos, and links to websites or other files to keep your lesson running smoothly instead of searching through physical files or a bunch of browser tabs.

.png)
.png)
.png)
Once you create the unit slides, you can reuse them from year to year and easily make changes to fit the needs of your students that year.
Here are some tips for creating organized unit slides:
1️⃣ Create a separate Google Slides file for each unit for each subject you teach
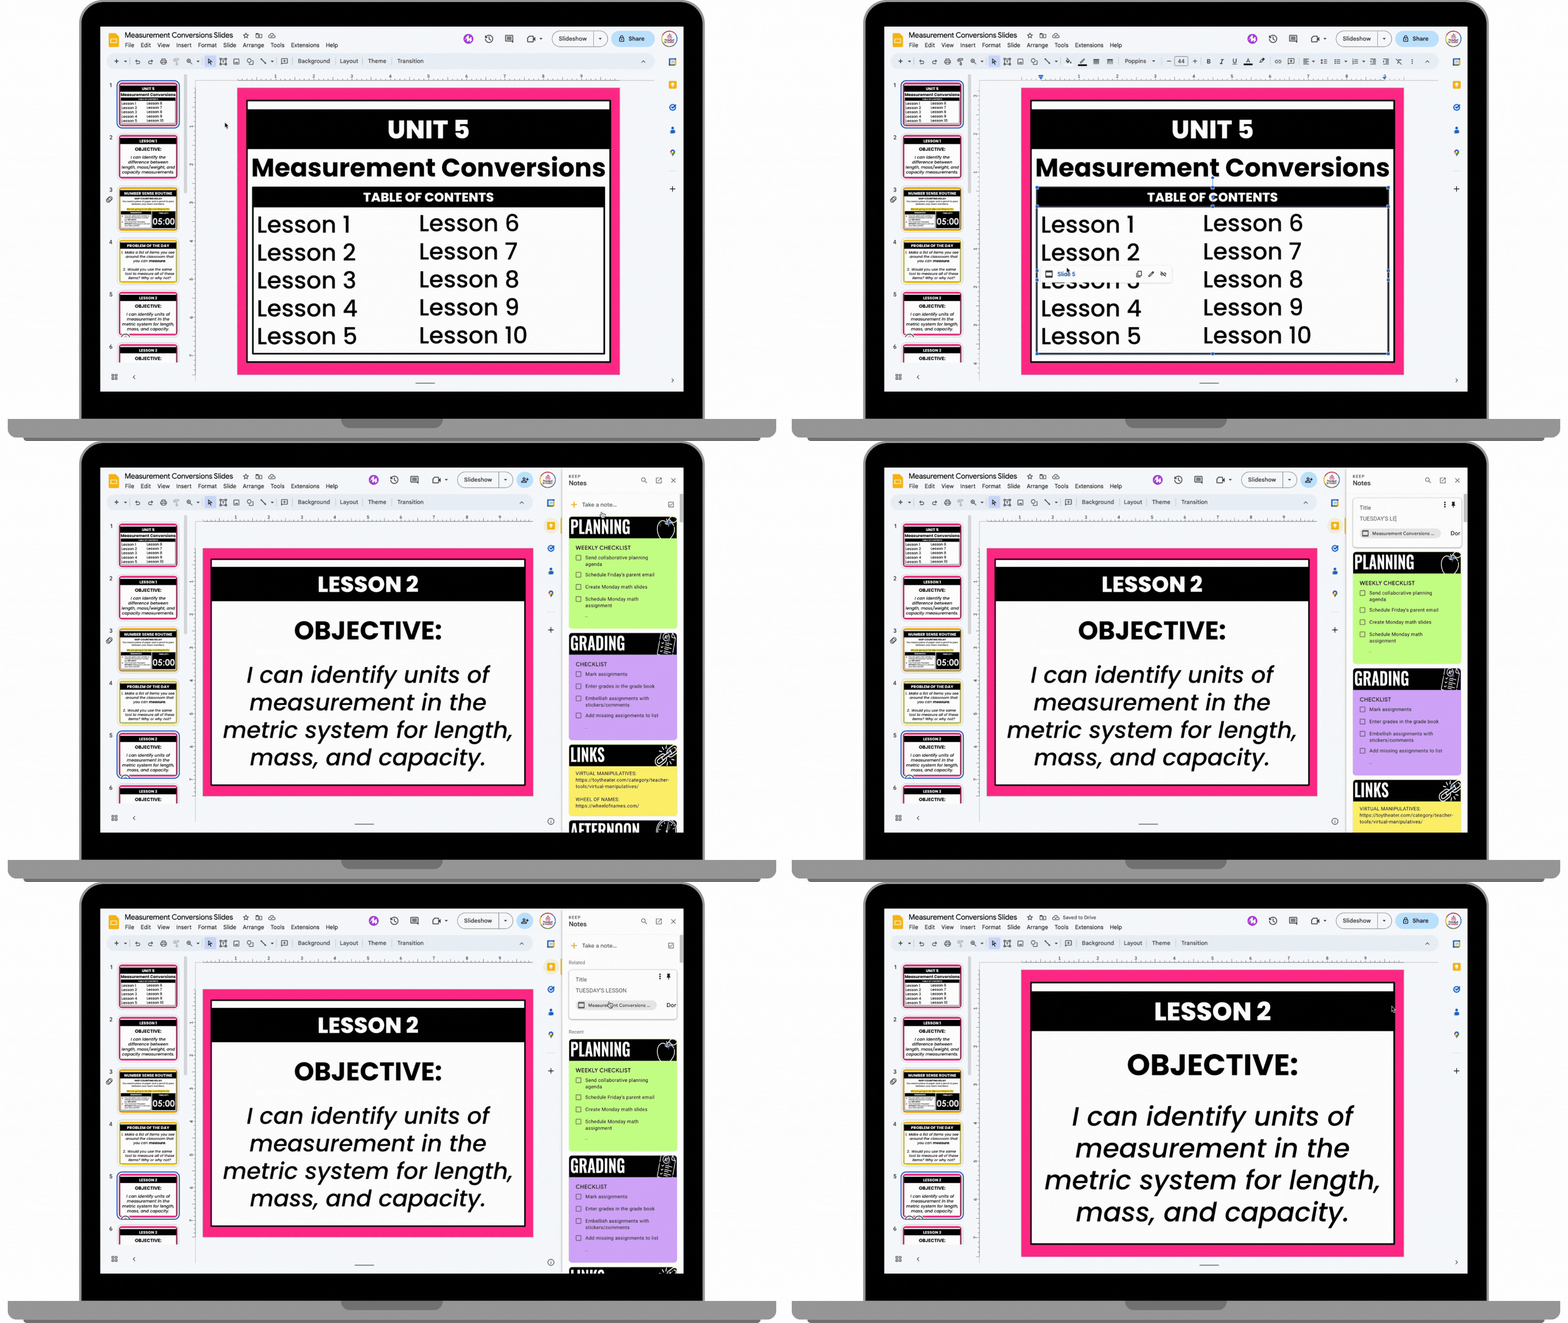
2️⃣ Add a "table of contents" slide that lists the lessons for the unit
3️⃣ Link the table of contents to the corresponding slides
If you need help setting them up, you can check out the step-by-step tutorial video below!
VIDEO TUTORIAL:
GRAB THE TEMPLATE:
If you want to save even more time, you can grab my set of Bright Google Slides Templates!
These templates are already formatted with borders, headings, and text boxes but are FULLY EDITABLE so you can customize the colors and fonts.
You can check them out using the link below and even take a closer look at what's included:
As an added bonus, the slides include video timers ranging from 1 minute to 30 minutes that can help keep your lessons on track! The timers are already inserted on the slides but the video files are also included so you can even add them to other slides you have created.
2. USE A DIGITAL PLANNER

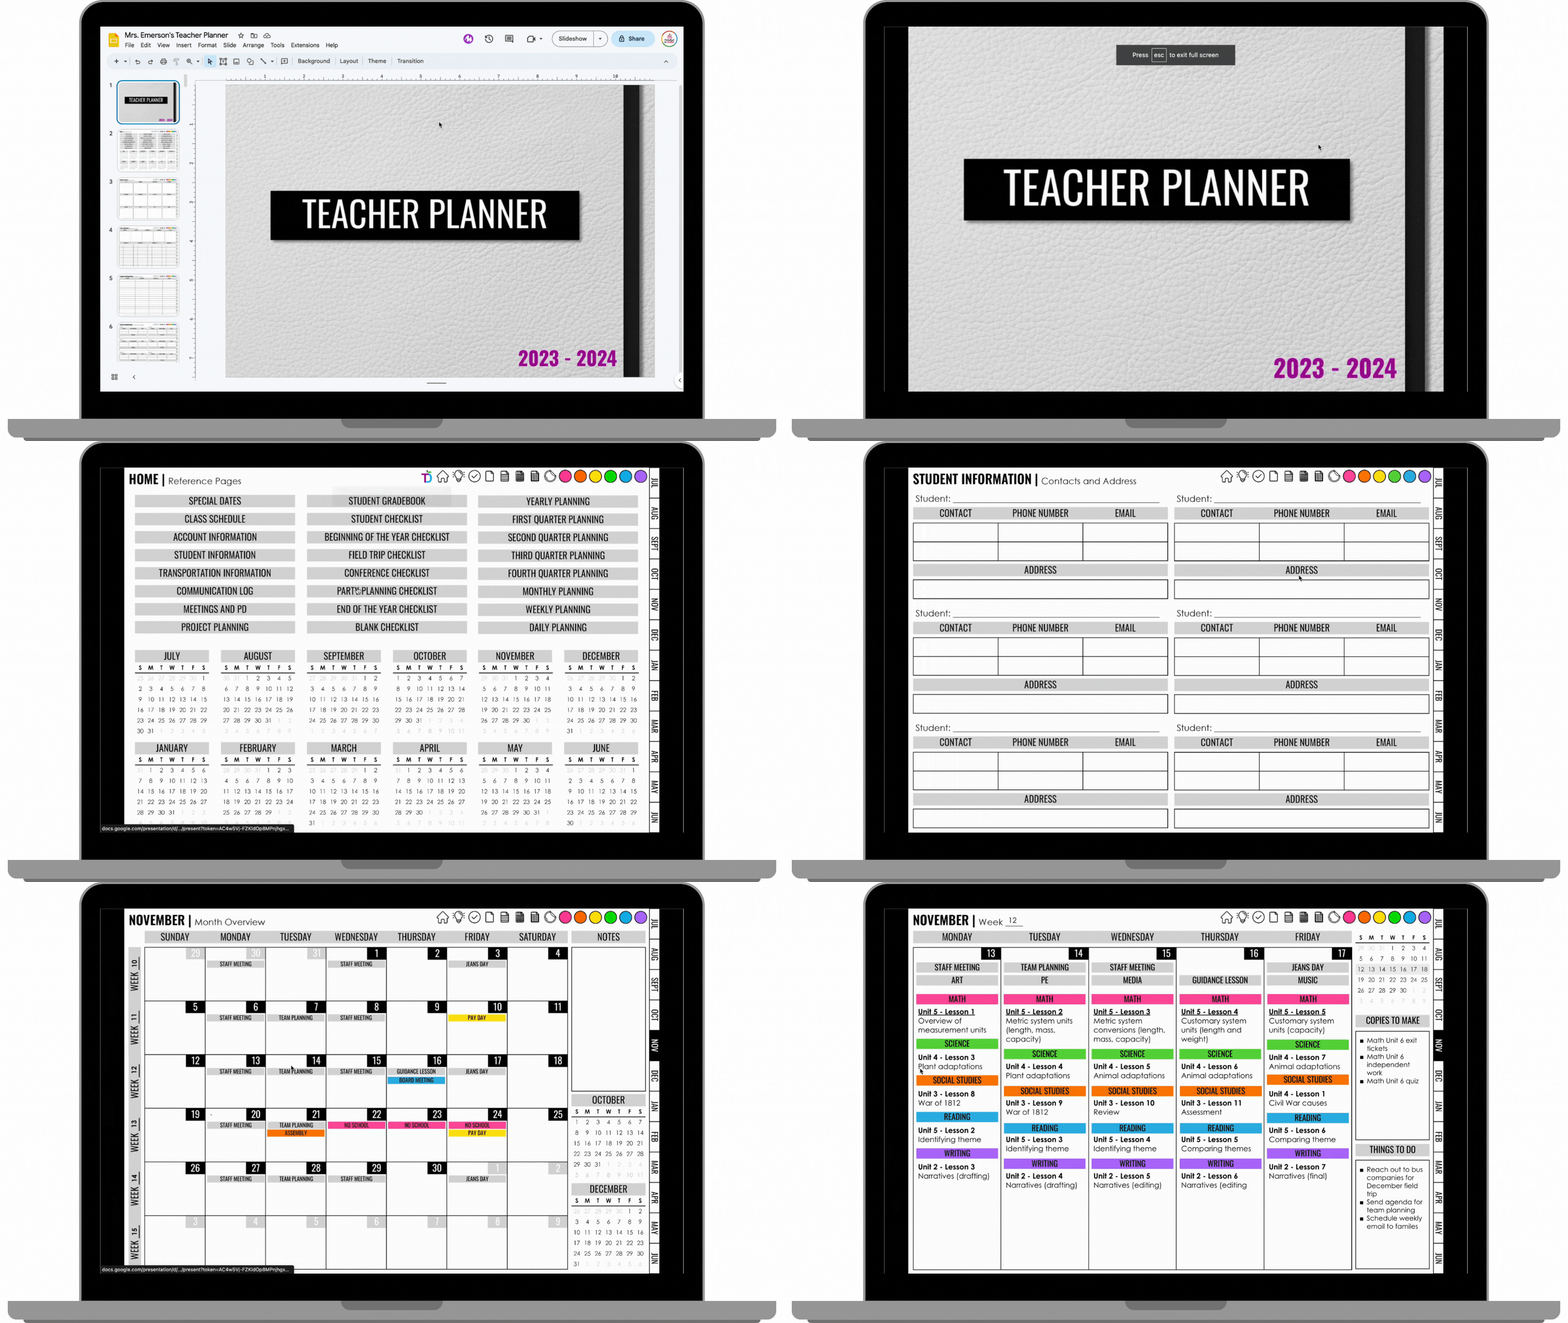
If you haven't yet switched from your paper planner to a digital planner, I PROMISE it's worth it!
There are so many forms of digital teacher planners but the two most popular formats are Google Slides and a PDF (which is used with an annotation app on a tablet).
Personally, I'm team Google Slides when it comes to digital teacher planners because it works SEAMLESSLY within your Google account.
Here are some of the top benefits of digital planning:
⭐ Your planner can be accessed on ANY device (at school or at home)
⭐ The tabs and buttons are HYPERLINKED so you can easily navigate through the pages
⭐ Copy and paste saves you so much time from week to week
⭐ Can add images and link to other files (such as your unit slides)
⭐ The text is SEARCHABLE so you can quickly find what you need
⭐ Can add DIGITAL STICKERS to customize your planner
If you want a closer look at the ins and outs of a Google Slides digital planner, check out the full tutorial video below!
VIDEO TUTORIAL:
I think one of the most powerful features of digital planning is the ability to link to other files.
If you create the unit slides as described above, you can then link to those slides in your Google Slides planner. Instead of writing out all the details of your lesson, you can just list the unit and lesson number and maybe a reminder of what the lesson focus and the link that text to your unit slides.
Here's an example of what a page of your digital planner could look like (the underlined text is linked to the unit slides example you saw above):

GRAB THE DIGITAL PLANNER:
Are you ready to dive into the digital planning world?
You can grab the current Google Slides Digital Teacher Planner in a landscape or portrait orientation using the link below!
Each planner is pre-dated for the entire year and all of the slides area already hyperlinked to save you time as you navigate through the pages.
A NOTE ABOUT DIGITAL PLANNER AVAILABILITY:
The school year digital planners ranging from July to June are available from May until October.
The calendar year digital planners ranging from January to December are available from November to April.
3. BOOKMARK A SPECIFIC SLIDE

Did you know you can bookmark a specific slide in a Google Slides file?
If you have a LARGE Google Slides file with dozens or even hundreds of slides, you can save time by saving a link to a specific slide. For example, let's say you left off on slide 56 and want to be able to jump directly to that slide when you pick up your lesson the next day... this is how you do it!
The secret is to create a Google Keep note inside the Google Slides file!
Google Keep is basically like a digital version of sticky notes that you can access using the side panel in any Google app such as Google Drive or Google Slides.
You can create notes in Google Keep at any time, but when you create a note inside of a Google Slides file, a link to the slide you are currently on will automatically be attached to the note!
Here are the step-by-step directions:
1️⃣ Open the Google Slides file and select the slide you want to bookmark
2️⃣ Open the side panel by clicking the arrow in the bottom right corner of the screen
3️⃣ Click the Google Keep logo (yellow sticky note with a light bulb inside)
4️⃣ Create a new note by clicking "Take a note" at the top
5️⃣ Give your note a title (the link to the Google Slides file will automatically generate)
Then, when you want to go to that specific slide, just click the link in the Google Keep note you created!
If you want to see a tutorial of the steps, check out my 10 BEST Google Slides HACKS for Teachers video (hack number 8 at 19:04):
VIDEO TUTORIAL:
You can also open the full screen version of Google Keep by visiting keep.google.com in your address bar.
Once you're there, you can open or edit any of your notes as you see below. If you're bookmarking slides you left off on for your lessons, I suggest dating the note or adding reminders for yourself to reference for the next lesson.
You can also share your note with others to keep team teachers or co-teachers in the loop!

FREE GOOGLE KEEP HEADERS:
You might have noticed the black headers on my Google Keep notes... those are actually just images I inserted to fancy up my notes a bit.
I have a set of 10 FREE Google Keep headers available for you to try! Don't worry... the download also includes directions on how to insert the headers to your Google Keep notes so there is no confusion.
Hopefully these ideas will help you save time the next time your lesson planning! Remember, change can be hard at first and takes time to get used to. But, once you adapt, these changes can save you LOADS of time in the long run!
If you want to check out other tutorials, resources, and ideas related to Google Slides, click below!


%20(4).png)


